Importing State Business Page Data
The Import feature in Stratus allows you to bring data directly into the platform from pre-recognized file types, eliminating the need for repetitive manual entry. Using imports not only saves time but also helps reduce the risk of errors that can occur when re-entering the same figures.
The Import function is available in multiple areas of the software. You can import premiums and dividends into the State Business Page (SBP) and Schedule T, helping ensure consistency across your returns.
To import your SBP you will need an ASCII file (.txt) or NAIC (.s) file. When importing an ASCII file, the format for Stratus is the same as it was in Enterprise (SBP, SchT), making the transition straightforward.
Steps to Import the SBP:
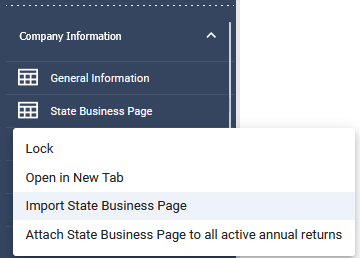
- Open the Import Window
- Right-click on the State Business Page in the tree.
- Select “Import SBP Data.”
- Select the Input Format
- Choose NAIC if you are using the same file that has or will be used for your NAIC submission.
- This file is typically generated by your annual statement vendor software but does not need to be fully complete for premium tax purposes.
- If certain Exhibits (e.g., Losses, Expenses) are not yet finalized, but the State Business Pages are, that is sufficient for the import.
- Choose ASCII if the file was not generated by your annual statement vendor software.
- Select the Replace/Append Options
- Add/Replace State(s) – Adds data for all selected jurisdictions present in the import file. If data already exists, the imported data will replace it. States not included in the file remain unchanged.
- Replace/Append Lines of Business(es) – Useful when importing multiple files containing different lines of business. New data is added for lines in the file; existing data for those lines is replaced. Lines not in the file remain unchanged.
- Clear Data – Deletes all previously entered State Business Page data before importing a new file. This option is helpful if the wrong file was imported.
- Select Jurisdictions
- Choose the jurisdiction(s) you want to import data for.
- Upload the File
- Click the upload icon and navigate to the file location, or
- Drag and drop the file directly onto the upload icon.
Import Sch T
- Right Click on the Schedule T in the tree
- Select Import Schedule T
- Select the file format
- Drag the file into the upload box or click to navigate to the file location
Whenever possible, importing your data is a best practice. It helps streamline your workflow, maintains consistency across schedules, and reduces the potential for errors compared to manual entry.