Premium Pro Help
Reference Tool
The Reference tool allows users to place custom references on returns.
The reference has a visual identifying label on the return, a place to
enter notes (similar to a sticky note), and the ability to link to a static
file or folder or to an attachment in the Attachment Frame.

Steps to create a Custom Reference Template
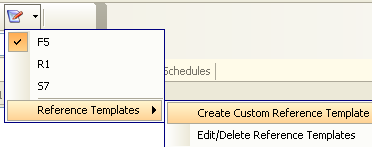
- To create a custom reference template, click on the down arrow
next to the reference icon on the standard toolbar, go to Reference
Templates, and select Create Custom Reference Template.
- On the Reference Template Creator screen, select a name for the
reference and the reference text.
- Choose a desired font, size, effect, and colors.
- Select OK to create the reference template.
To edit or delete an existing template, click on the down arrow next
to the reference icon, go to Reference Templates, and select Edit/Delete
Reference Templates.
The name, date, and time listed on a reference is updated based on
the most recent user that modifies the reference.
Steps to add a Reference to a Form
- Open a return and view the desired page.
- Click on the reference icon on the standard toolbar. Select the
desired reference template by clicking on the drop down arrow.
- Click in an open area on the page to insert the reference.
To change the reference label or text, right click on the reference
and select Edit Reference Text.
To delete a reference on the form, right-click on the reference and
select Delete Reference.
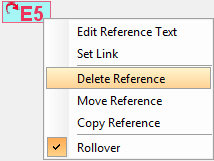
To change the location of an existing reference, select the Reference
and then right-click on it and select Move Reference. Place the reference
in the desired location and click to place the reference in that location
on the form.
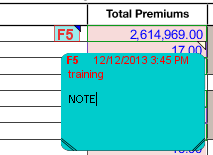
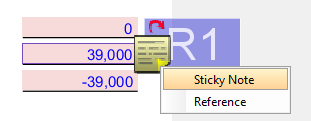
To add or edit a note associated with a reference, double click on the
reference text to expand the note box. To close it, double click on it
again. Once a note is added, a blue triangle will appear next to the reference
text.
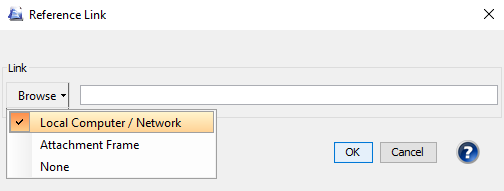
To add or edit a hyperlink associated with a reference, right click
on the reference text and select Set Link. In the link dialog box, click
on the down arrow next to the browse button to specify Local Computer/Network,
Attachment Frame, or None. Browse to the desired file, folder, or link
and select open. Press OK.
A link icon will appear beside to the reference text to indicate there
is a file associated with the reference.
The linked file can then be opened by right clicking on the reference
and selecting Follow Link.
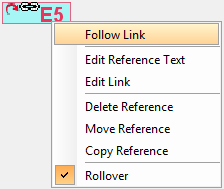
If you would like a reference to rollover to the next year, right click
and choose Set to Rollover. The reference text will then have a red arrow
indicating that it is set to rollover. If later you decide to not rollover
the reference, right click on the reference text and choose Unset to Rollover.
To copy a reference, right click on the reference and choose Copy Reference.
You can then paste the reference to another spot on the page you are viewing,
another page, or another return by right clicking and choosing Paste Reference.
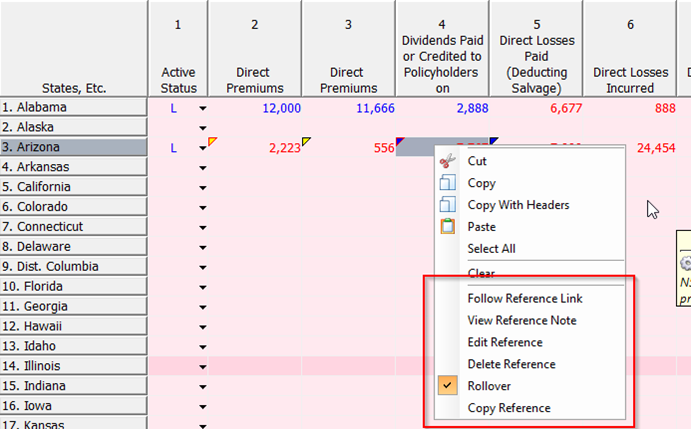
You may also add references to cells of any schedule, except the
Payment Request Schedule, Summary of Taxes by State Schedule, and Adjustment
Schedule.
References are also now color coded:
- Cell that has reference WITHOUT a link will indicate with a YELLOW
triangle.
- Cell that has reference WITH a link will indicate with a BLUE triangle.
- Rollover will indicate with RED border and NOT rollover will indicate
with BLACK.
Printing Options
Any custom Review Layer marks added to a form by the user will also
print if that printing option is selected. To select this option, go to
the Tools menu, select options. Then click on the Printing Options tab.
Check the items under Review Layer that you would like to print. Tools>Options>Printing
Options
Overlapping Markup Tools
You may run into an occurrence when you have more than one markup tool
overlapping on a single field or location on a return. When you right
click on the area, the menu for the wrong tool may show up. To switch
to the tool options you want to access, use Alt + right click.
Our website
address: www.tritechsoft.com
Our mailing
address: 1205 S. Greenville Ave, Allen, TX 75002.
Questions?
You can reach us at 1-800-380-6407
Or
contact Support
here.
©1995-2019
TriTech Software Development Corp. ©2006-2019 TriTech Services Inc. All
rights reserved. Premium Pro® is a registered trademark.