Premium Pro Help
Stamps
The Stamps feature allows you to create custom stamps and add them to
a form. Stamps added to a form by the user will also print, if that printing
option is selected. To select this option, go to the Tools Menu, and select
options. Then click on the Printing Options tab. Check the box under Reviewer
Layer that says Stamps. Tools>Options>Printing Options tab

Steps to add a Stamp to a Form
- Open a return and view the desired page.
- Click the Stamp icon on the standard toolbar or go the Tools menu
and select Comment & Markup and Stamps.
- Click in an open area (white space) on the page to insert the selected
stamp.
To change the default stamp, click on the down arrow next to the stamp
icon on the standard toolbar. Select the desired stamp from the list of
available stamps.

To delete a stamp on the form, right click on the stamp and select delete.
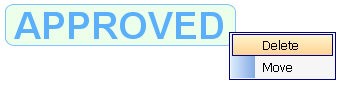
To change the location of an existing stamp, select the stamp and then
right click on it and select move. Place the stamp in the desired location
and click to affix the stamp to that location on the form.
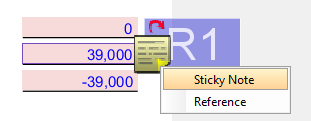
You may run into an occurrence when you have more than one markup tool
overlapping on a single field or location on a return. When you right
click on the area, the menu for the wrong tool may show up. To switch
to the tool options you want to access, use Alt + right click.
To create a custom stamp, click on the down arrow next to the stamp
icon on the standard toolbar and select Create Custom Stamp Template.
On the Stamp Template Creator screen, select a name for the stamp and
the stamp text. Choose a desired font, size, effect, and colors. You can
also include the date and time as well as the username in the stamp. Use
the copy button to create a copy of an existing stamp. Select OK to create
the new stamp.
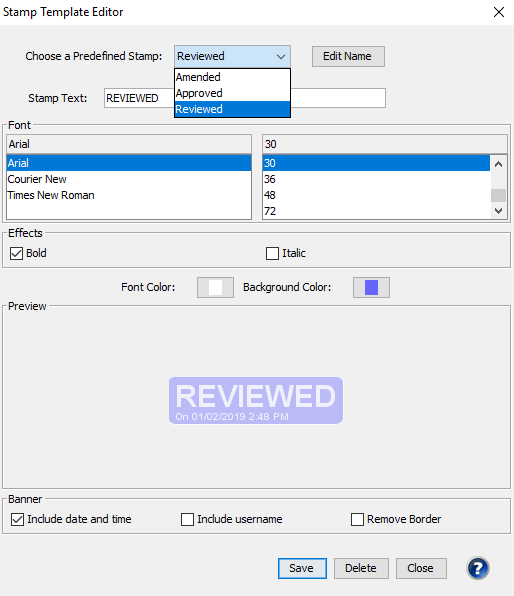
To edit or delete an existing stamp, click on the down arrow next to
the stamp icon on the standard toolbar and select Edit/Delete Stamp Template.
Use the drop down box on the Stamp Template Editor to select the predefined
stamp you want to modify. Make the necessary changes, and select save.
To delete the stamp, click the delete button and then Close.
Our website
address: www.tritechsoft.com
Our mailing
address: 1205 S. Greenville Ave, Allen, TX 75002.
Questions?
You can reach us at 1-800-380-6407
Or
contact Support
here.
©1995-2019
TriTech Software Development Corp. ©2006-2019 TriTech Services Inc. All
rights reserved. Premium Pro® is a registered trademark.