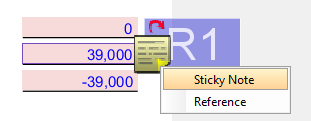
Premium Pro Typewriter
The Typewriter feature allows the user to add custom text to a form
by typing directly on the return. Any custom text added to a form by the
user will also print.

Steps to add Custom Text to a Return
- Open a return and view the desired page.
- Click the Typewriter Icon on the standard toolbar or go the Tools
menu and select Comment & Markup and Typewriter.
- Click in an open area (white space) on the page to insert a field
and begin typing.
Delete
or Move Custom Text
To delete custom text on a form,
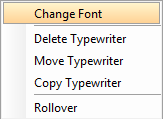
right click on the typewriter field and select delete.
To change the location of an existing typewriter field, select the field
and then right click on the text and select move. Place the typewriter
text in the desired location and click to affix the text to that location
on the form.
You may run into an occurrence when you have more than one markup tool
overlapping on a single field or location on a return. When you right
click on the area, the menu for the wrong tool may show up. To switch
to the tool options you want to access, use Alt + right click.

Change
the Font and Size
To change the font and size of the text, select the desired typewriter
field, right click, and choose Change Font. Or, click on the arrow next
to the typewriter icon on the tool bar and select Change Typewriter Attributes.


On the Font Chooser screen, you can select Arial, Courier New, or Times
New Roman. You can also adjust the font size from 8 to 72.
Copy
and Paste
To copy the typewriter field, right-click on the typewriter field and
select Copy. You may then right-click on other areas, pages, and returns
and choose Paste Typewriter.
Rollover
If you’d like the typewriter field to rollover to the next product year,
right-click and choose Set to rollover. If you later decide the field
does not need to rollover, right-click on the field and choose deselect
Rollover.
Our website
address: www.tritechsoft.com
Our mailing
address: 1205 S. Greenville Ave, Allen, TX 75002.
Questions?
You can reach us at 1-800-380-6407
Or
contact Support
here.
©1995-2019
TriTech Software Development Corp. ©2006-2019 TriTech Services Inc. All
rights reserved. Premium Pro® is a registered trademark.

