Custom Reports
You can create custom reports if the standard reports do not meet your
needs. This feature allows you to include only the columns
or fields that you need. You may also limit the number of policies
returned by setting specific criteria for any or all fields.
Steps to Create a Custom Report
- Double-click on the Custom Reports node appearing in the Report
Tree.
- Select a report from Choose a Report to Start With. If
you want to start with a blank canvas, choose Custom Report. Otherwise,
choose an existing report as a template.
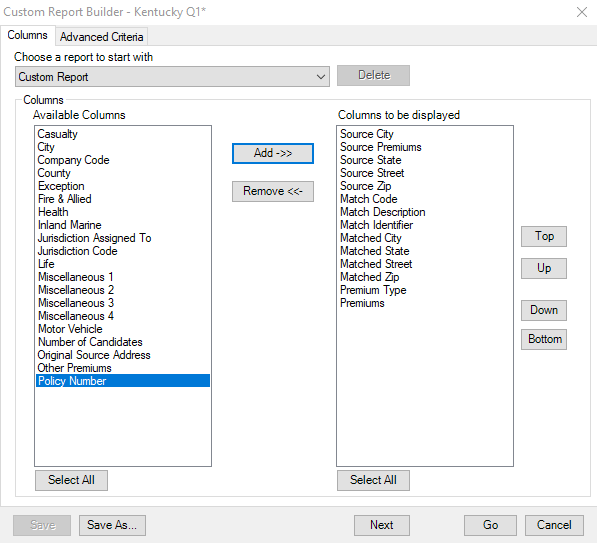
- Select any columns you want to add to your custom report from the
Available Columns list.
- You can change the display order of columns by selecting fields
in the Columns to Be Displayed list and using the top, bottom, up,
and down buttons. You can save the report at this time or you can
apply advanced criteria.
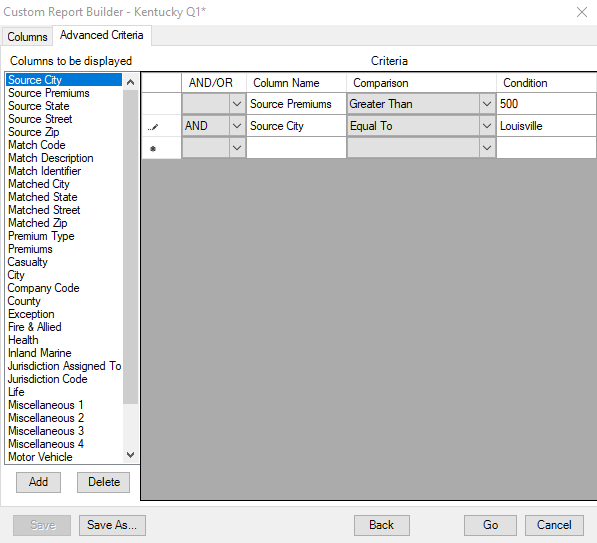
- Click the next button to set any advanced criteria. Double-click
on any field appearing in the Columns to Be Displayed list. Click
on the drop-down appearing in the comparison field and choose any item
from the list (such as Equal To or Greater Than). Then type a value
in the Condition field.
- You may continue to add additional criteria for any additional
columns by following the steps above. Choose either AND or OR from
the AND/OR field for each additional criterion added.
- When you have completed the report, click Save As and type in the
name of the new report. Click Go to load the new custom report.
- Once you have created a custom report, you may run it at any time
by clicking on Custom Report in the tree. Select the report name from
the drop-down box and click Go. You can also access custom reports
by clicking on the Load Custom Report icon on the toolbar.