Exporting Data
The Export utility exports data from Allocator to fixed width text and
CSV file formats. You may export any of the predefined reports found in
the tree or any custom created report. The Export utility is also used
to create an import file (*.imp) for Premium Pro Enterprise Municipal,
P&C, or Life; and to create the New York State Fire Tax Distribution
file (*.txt). You may also create an import file (*.imp) for NY Fire.
To export data from Premium Pro Allocator to Enterprise
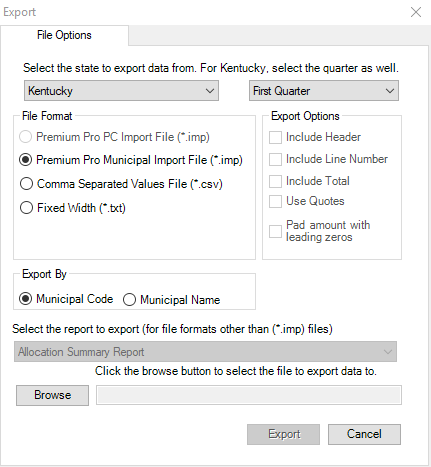
Steps to export an imp file:
- Select Export from the Tools menu. The Export dialog will appear.
- Select the state for which you would like to export data (if Kentucky
is selected, you must also select the filing quarter).
- Select the file format as Premium Pro (imp)*
- Select Export By as Municipal Code or Name.
- Click the Browse button to choose the name and path of the export
file.
- Click the Export button to export the data.
See Supported States for more information
on the individual state formats.
*Alabama, Kentucky, Illinois, New York Fire Protection and North Dakota:
Exports a file that is imported into Premium Pro Municipal.
* Delaware and New York MTA: Does not export a file that can be imported
into Premium Pro Enterprise.
* Georgia and Louisiana: Exports a file that can be imported to Premium
Pro Municipal and Premium Tax.
* South Carolina: Exports one file format that can be imported into
Premium Pro Municipal and a separate file format that can be imported
into Premium Tax.
* Florida: Exports a file that is imported into Premium Pro Premium
Tax.
* New York Fire Protection: Creates a txt file that can be filed with
the NY Department of Insurance in either stock or mutual company format.
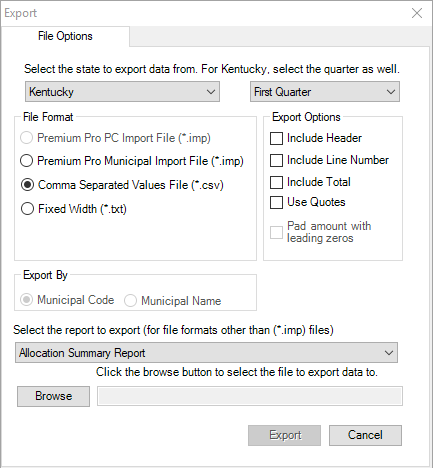
Steps to export a CSV File
- Select Export from the Tools menu. The Export dialog will appear.
- Select the state for which you would like to export data (if Kentucky
is selected, you must also select the filing quarter).
- Select the file format as Comma Separated Value File (*.csv).
- Select the report you want to export.
- Click the Browse button to choose the name and path of the export
file.
- Click the Export button to export the data.
Steps to export a Fixed Width File
- Select Export from the Tools Menu. The Export dialog will appear.
- Select the state for which you would like to export data (if Kentucky
is selected, you must also select the filing quarter).
- Select the file format as Fixed Width.
- Select the report to export.
- The Fixed Width Options tab will become available. Click on this
tab to set custom widths for your export columns.
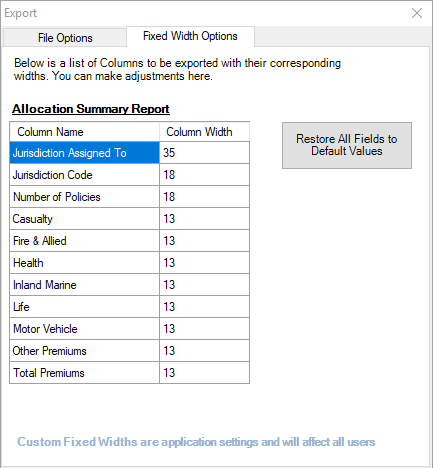
- Return to the File Options tab and select the report you want to
export.
- Click the Browse button to choose the name and path of the export
file.
- Click the Export button to export the data.