Premium Pro Enterprise includes a Payment Request page, formerly referred to as the Check Request, that is displayed with the associated state return. The standard form includes various items such as the payee information and the ability to input up to six G/L descriptions, account numbers, cost centers, and amounts. The payment request description also includes the state abbreviation and tax year.
You will also now find a drop down box on the Payment Requisition Form which allows you to choose your payment method: Check, ACH Credit, ACH Debit, Credit Card, or EFT. You will also find a field for the addenda record, which may be generated when paying by ACH Credit by using the Addenda Schedule. Also, the company NAIC number can be found in the top left hand corner of the Payment Request form.
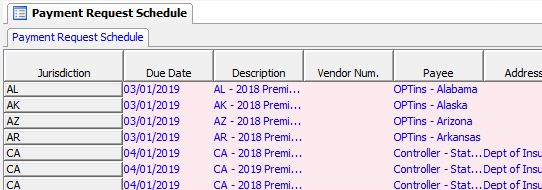
The information on the Payment Requisition Form does source in from the Payment Request Schedule, and vice versa. The Payment Request Schedule provides a convenient place for you to view all of the active payment requests in Enterprise and review your amounts due. You may also use the copy and paste feature here to fill in recurring values to avoid repetitious work.
On the Payment Request Schedule you may customize the heading names on the columns labeled 1st GL Description through 6th Amount to best suit your company needs. To do this, right click on the desired heading name and select Rename. When prompted, type in the new heading text. Once you change the column names for one company, the new headings will transfer to the Payment Requisition Forms associated with each return, as well as to all other companies you have registered to use Enterprise.
Note that when a return is amended, there is a row in the Payment Request Schedule for the original previously filed return. The row will be white and disabled to preserve the original amounts. The row for the amended filing will be pink and active.
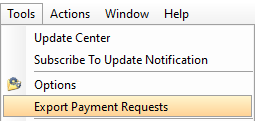
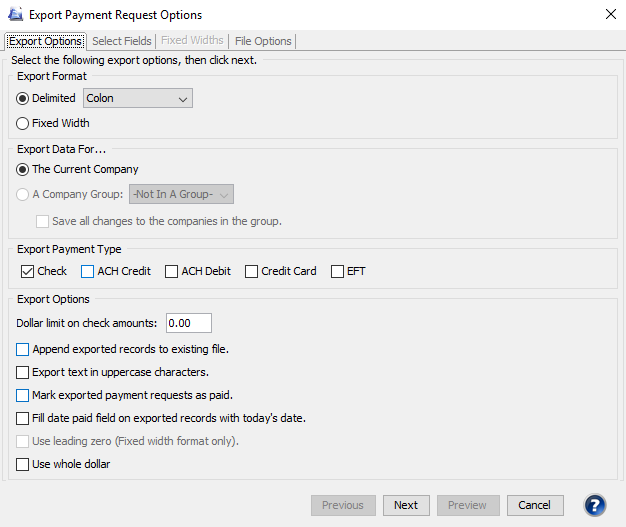
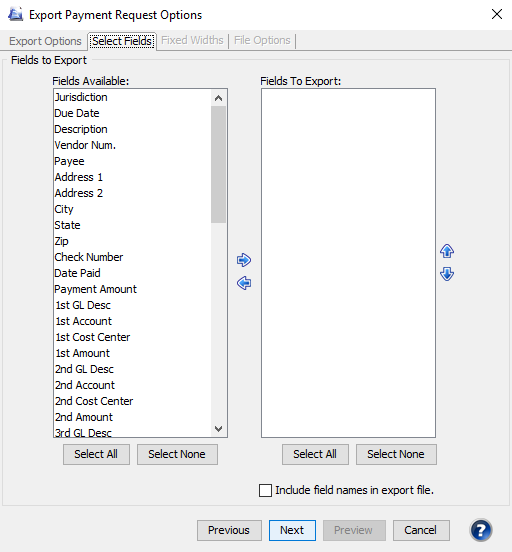
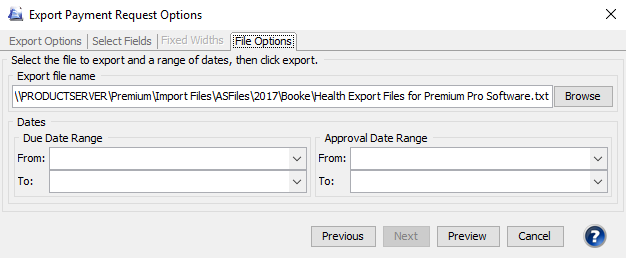
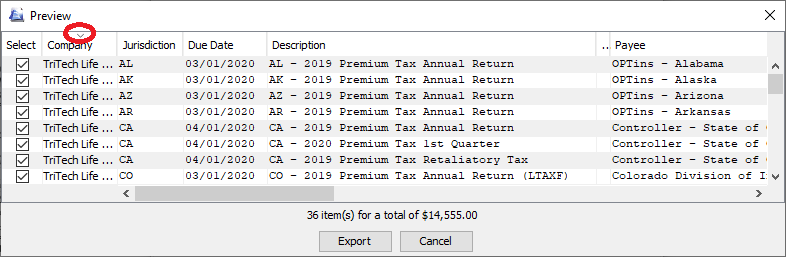
Our Payment Request Export feature allows you to export the information in the Payment Request Schedule to an ASCII file that can then be imported into your accounts payable system. Tools>Export Payment Request
You may sort each column in ascending or descending order by left-clicking on the column headers. Note the caret indicating the status of a sorted column. !NEW
Our website address: www.tritechsoft.com
Our mailing address: 1205 S. Greenville Ave, Allen, TX 75002.
Questions? You can reach us at 1-800-380-6407
Or contact Support here.
©1995-2019 TriTech Software Development Corp. ©2006-2019 TriTech Services Inc. All rights reserved. Premium Pro® is a registered trademark.