Occasionally it is helpful, and at times necessary, to grant certain permissions to a user within the application depending on his or her level and area of responsibility. The Roles Wizard will allow you to create, edit, and view roles based on a number of permissions defaulted in the application. It will be accessible only to a designated Administrative User either from the Tools menu or from within the Admin Tool on the user Tab.

Once the Roles Wizard has been initiated, a window will appear and walk you through the process. Click Next on the introduction screen to continue.
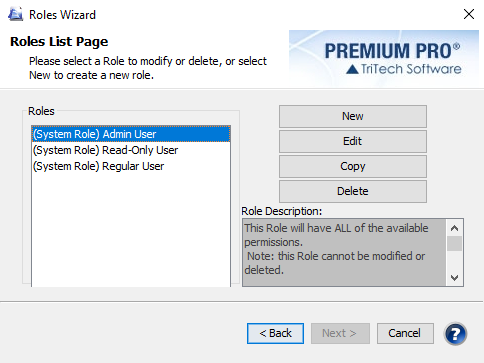
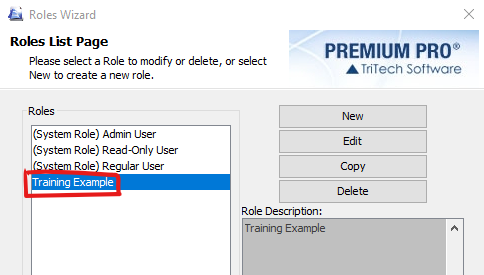
The Roles List Page will display the roles currently available in the application. You can click on each role listed here for a description of its permissions and any other pertinent details. System Roles are default roles in the application and cannot be modified or deleted. You can click on the Edit button when any of the System Roles are selected but you will only be able to view the permissions set for these roles and will not be able to make any modifications to them.
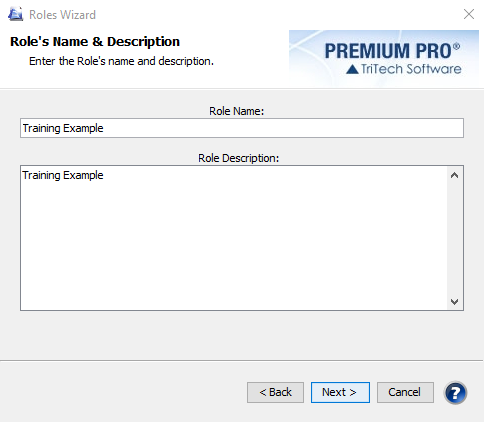
To create a new role, click on the New button. On the following screen that appears, you will enter the desired role name and description and click Next.
The first set of permissions to choose from will be those that affect the application as a whole ranging from rollover to applying updates. Select the application permissions the new role should be able to perform and click Next.

The following screen is for permissions that are specific to jurisdictions. They include such permissions as being able to edit returns, adding and deleting attachments, and electronically filing returns.
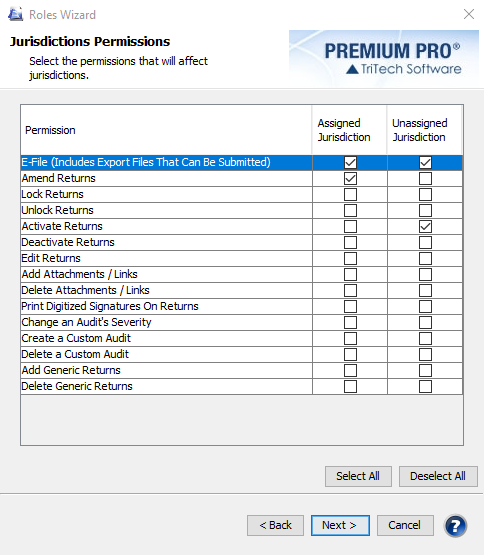
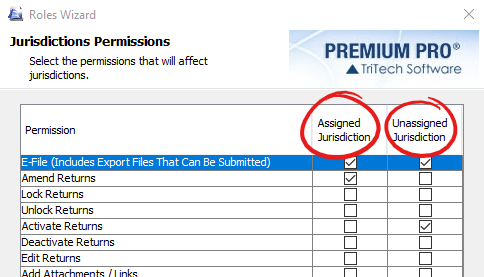
Since you can assign specific jurisdictions to certain users, you may want to differentiate a user’s permissions to perform tasks based on assignment. The jurisdiction permissions window allows you to give users permissions for both assigned and unassigned jurisdictions. Go through the list and select the jurisdiction permissions the role should be able to perform and click Next.
Once you are satisfied with your permission selections, you may click Finish to save the role. The next time you access the Roles Wizard, the new role will be available on the Roles List Page. You can go back at any time to the Roles Wizard to edit or delete any custom roles you have created or copy a role to use it as a basis to create new roles.
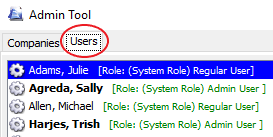
To assign roles to users, you will do so by accessing the Admin Tool. Click on the Users tab and select the user to which you wish to assign a role.
Under the User Information section, select the desired role from the Role drop down menu and then click on Update User.
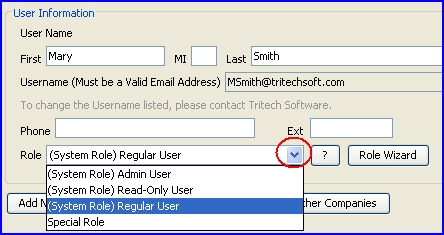
In order for these changes to take effect, the application must be restarted. By default, all users will be initially assigned to the “System Role - Regular User." This default role grants access to all application and jurisdiction permissions available except: access to the Admin Tool, the ability to edit the Login Schedule, the ability to change Calendar options, the ability to apply updates, and the ability to make assignments.
Clicking on the question mark button beside the role drop drown box will provide you with a window that contains the description and permissions for the selected role.
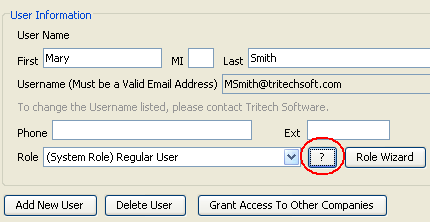
The Roles Wizard button will launch the wizard and will allow you to use it as previously described. Any custom roles created during this time will immediately be available from the Role drop down menu in the Admin Tool.
Our website address: www.tritechsoft.com
Our mailing address: 1205 S. Greenville Ave, Allen, TX 75002.
Questions? You can reach us at 1-800-380-6407
Or contact Support here.
©1995-2019 TriTech Software Development Corp. ©2006-2019 TriTech Services Inc. All rights reserved. Premium Pro® is a registered trademark.