Once the initial registration has been completed and Premium Pro Enterprise is fully installed, the Admin Tool may then be used by a designated Administrative User to add, edit, and remove users and companies to your account at any time from within the application. This feature is accessible from the Tools menu. You may choose to make changes to your account in either the Companies tab or Users tab.
Under the Companies tab, all companies registered under your account will be listed on the left side of the window beginning with the parent company, followed by all sub-companies. Clicking on a company name will populate the right side of the window with key information for that particular company.
The information for each company is broken out into two tabs: Company Information and Contact Information. The Company Information tab includes the company name, company abbreviation, federal ID number, state of incorporation, company type, company sub-type (i.e., Life, PC, HMO, Risk, Title and Life Health), and fields for the NAIC group and company codes.
You may use the company abbreviation field to enter an abbreviated version of a company’s name. When the user option 'Display company abbreviation instead of the full name' is checked, the company abbreviation will then be used to identify the company in the dropdown box on the Enterprise toolbar and other areas of the software. This will be beneficial in cases where a company's name may be too long to fully display in the dropdown box. (Tools>Options>User Options Tab)
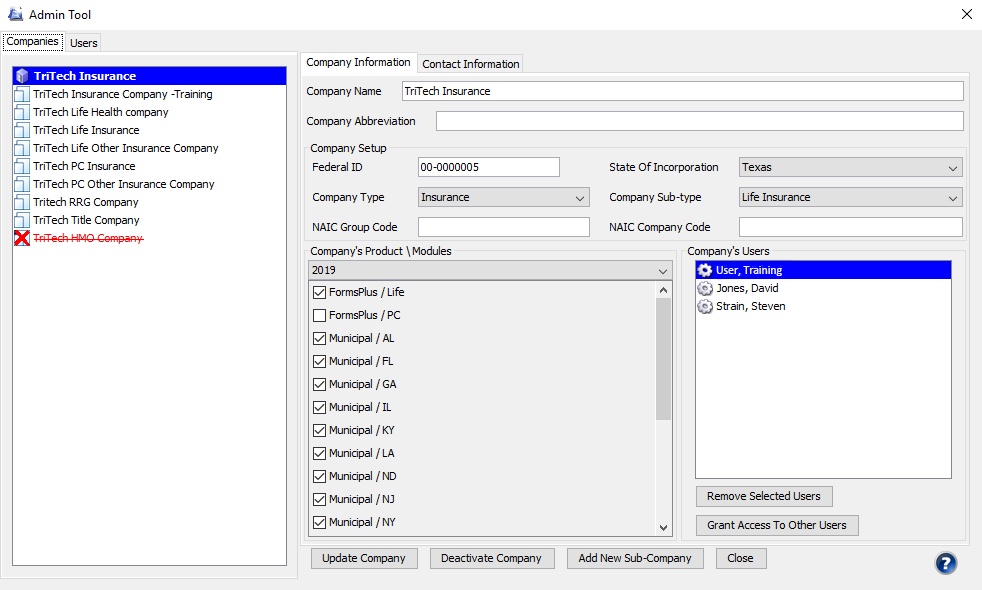
You will also see a Product/Modules Selection area. Only the products that you have purchased will be available under the Product/Modules list. Checking a desired item will provide that company with access to the specified product and module for the year selected in the year dropdown box. A list of users assigned to the company is also provided.
To assign users to a company, click the Grant Access to Other Users button on the Company Information tab. This will open another window listing the users that are not currently assigned to that company. You can then check the option to include the desired users. Clicking the Remove Selected Users button will remove the highlighted user’s access to the current company.
To register a sub-company, select Add New Sub-Company. You will be prompted to create a new empty company or to create a company using the current company selected as a template. If you choose to create a new empty company, you will need to manually enter the company data, contact information, and product module selection for the new company. If you decide to use the current company as a template, all of the current company’s information will be used to populate the new company. You can then make modifications, if necessary. When finished, select Save.
Deactivating a company will remove access to the company in the current and future years of the software. Deactivated companies will be listed at the end of the company drop down list on the Enterprise toolbar.
Note: You can create companies for testing purposes or what-if analysis by using the Create Test Company function which is accessible from the Tools Menu.
The Contact Information tab has fields for the physical and mailing addresses and various phone numbers for your company. There are also fields to enter information for the company’s main contact person and to enter officer names.
If at any time you need to edit the information for a company, you can do so here under the Companies tab. Clicking on the Update Company button will save your changes. This information will populate the General Information screen in all products for the current year only.
Under the Users tab, all registered users under your account will be listed on the left side of the window in alphabetical order by last name. Clicking on a user’s name will then display the user’s information and assigned companies and products/modules. You will find that under each user’s name and contact information there is additional information regarding roles. This is discussed in further detail in the Roles Wizard section.
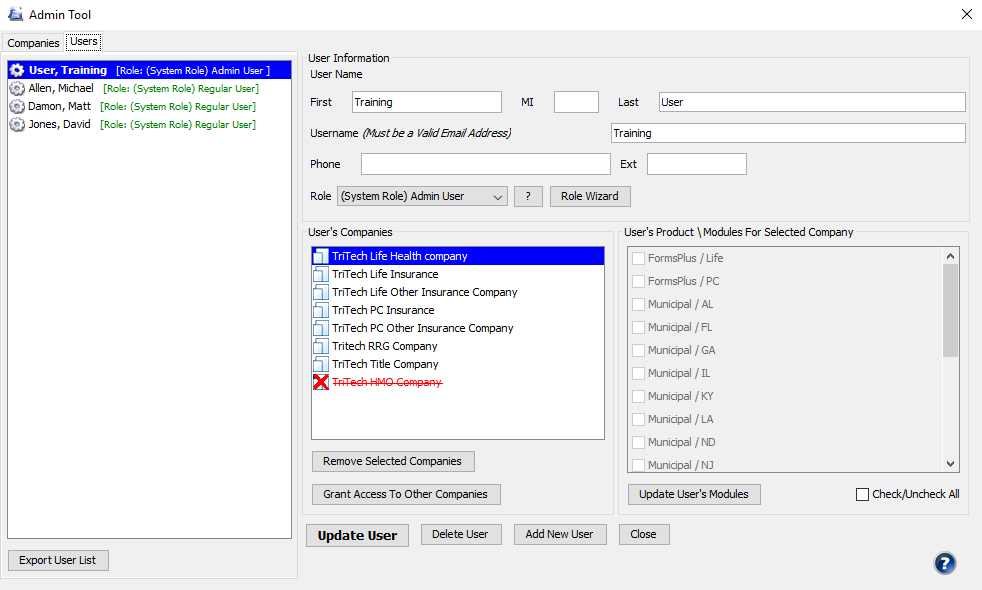
To change the user’s information, modify the desired items and then select Update User to save your changes. Selecting the Grant Access to Other Companies button will allow you to assign the user to other companies.
If you change the username, a notification including a temporary password will be sent to the new and old email addresses. The user will then be prompted to change their password upon logging in to the software for the first time.
To add a user, click on the Add New User button, enter the appropriate information, and click Save to complete the process.
You will be given the choice to automatically assign the user to all active companies under your account. If you choose no, the new user will only be assigned to the primary parent company listed on the account.
The new user will receive an email with their unique username and password that they will use to access the software. If you wish to remove a user entirely from your account, click on the Delete User button.
You can also assign a user access to specific Product Modules for a selected company. For example, if a company has access to both FormsPlus and Municipal, but a particular user should only have access to FormsPlus, you can check/uncheck the appropriate options under the Product Modules section. Now the user will only be able to access FormsPlus in Enterprise. Click Update User’s Modules to save the changes. You can remove a user’s access to a company entirely by clicking on the user’s name on the left, selecting the applicable company from the User’s Companies list, and then selecting Remove Selected Companies. Click the Update User button to save any changes.
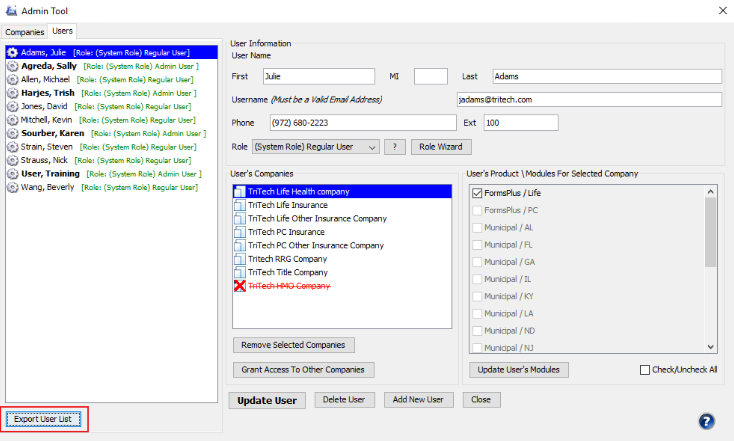
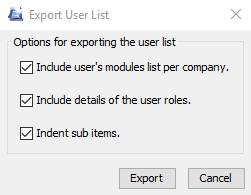
You may export a user list from the Admin Tool that details what each user has access to in Enterprise. The list can include which modules and companies each user has access to, as well as the user roles.
Steps to Export a User List:
Note that users can change their passwords by going to the Tools menu and selecting Change User Password.Admin users may set password restrictions in the Administrator Options.
If you forget your password, you can click on ‘Forgot Password’ on the Enterprise login screen to retrieve your password.
Our website address: www.tritechsoft.com
Our mailing address: 1205 S. Greenville Ave, Allen, TX 75002.
Questions? You can reach us at 1-800-380-6407
Or contact Support here.
©1995-2019 TriTech Software Development Corp. ©2006-2019 TriTech Services Inc. All rights reserved. Premium Pro® is a registered trademark.